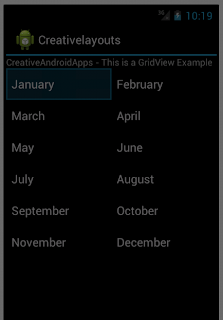
Android provides a two dimensional grid view to display the items in a scrollable grid.The grid items will automatically inserted into the layout using the list adapter.
Add the following lines in the layout file (layout file can be locate in res directory). open the main.xml and add the following lines
Now create the following activity class
Run the sample and you will get an output as grid view as follows
Add the following lines in the layout file (layout file can be locate in res directory). open the main.xml and add the following lines
<LinearLayout xmlns:android="http://schemas.android.com/apk/res/android"
    android:orientation="vertical"
    android:layout_width="fill_parent"
    android:layout_height="fill_parent">
 <TextView
        android:text="CreativeAndroidApps - This is a GridView Example"
        android:layout_width="wrap_content"
        android:layout_height="wrap_content" />
 <GridView
    android:id="@+id/grid"
    android:layout_width="fill_parent"
    android:layout_height="fill_parent"
    android:numColumns="2"
    android:columnWidth="100px"
    android:stretchMode="columnWidth"
    android:gravity="center"/>
 </LinearLayout>
Now create the following activity class
package com.example.creativeapps;

import android.app.Activity;
import android.os.Bundle;
import android.widget.ArrayAdapter;
import android.widget.GridView;

public class CreativelayoutsActivity extends Activity
{
     GridView myGrid;
     String[] listContent = {
                "January",
                "February",
                 "March",
                 "April",
                 "May",
                 "June",
                 "July",
                 "August",
                 "September",
                 "October",
                 "November",
                 "December"
     };
    @Override
    public void onCreate(Bundle savedInstanceState) {
        super.onCreate(savedInstanceState);

        setContentView(R.layout.main);
        myGrid = (GridView)findViewById(R.id.grid);
        //create the array adapter for the grid view
        ArrayAdapter<String> adapter
         = new ArrayAdapter<String>(this,
          android.R.layout.simple_list_item_1,
          listContent);
          myGrid.setAdapter(adapter);
     }

}
Run the sample and you will get an output as grid view as follows
 |
| Android Grid View Example |
No comments:
Post a Comment